Crafting A Whimsical Christmas Village Display Tree: A DIY Guide For 2024
Crafting a Whimsical Christmas Village Display Tree: A DIY Guide for 2024
Crafting a Whimsical Christmas Village Display Tree: A DIY Guide for 2024
Introduction
With enthusiasm, let’s navigate through the intriguing topic related to Crafting a Whimsical Christmas Village Display Tree: A DIY Guide for 2024. Let’s weave interesting information and offer fresh perspectives to the readers.
Table of Content
Crafting a Whimsical Christmas Village Display Tree: A DIY Guide for 2024
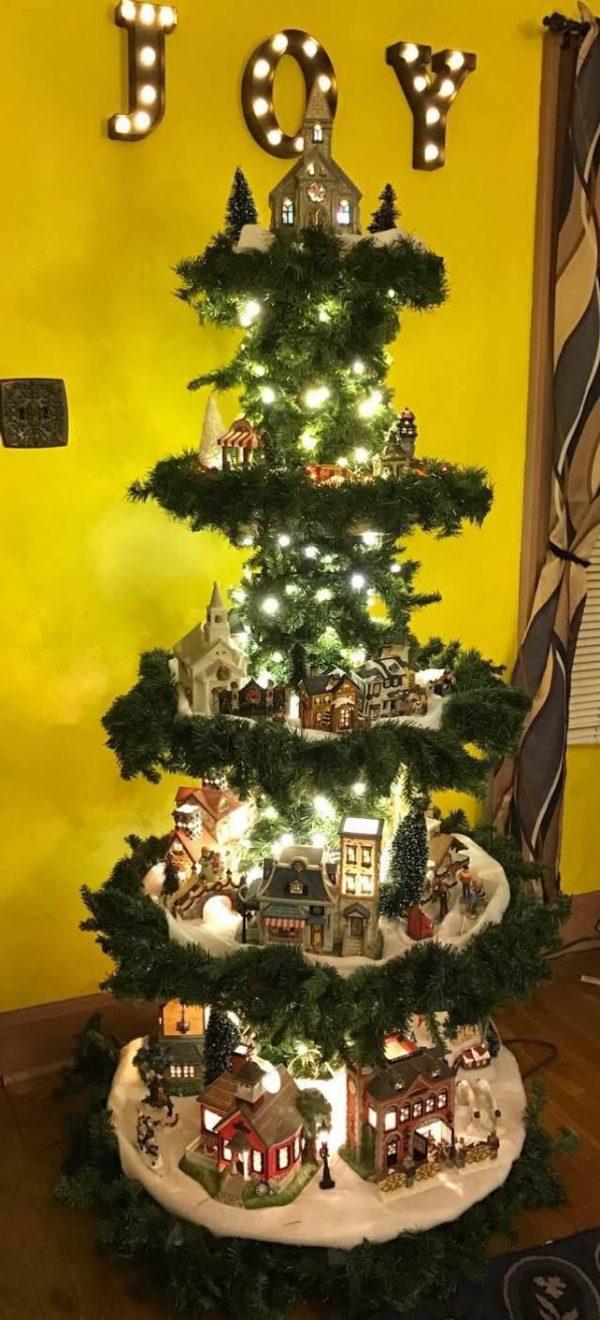
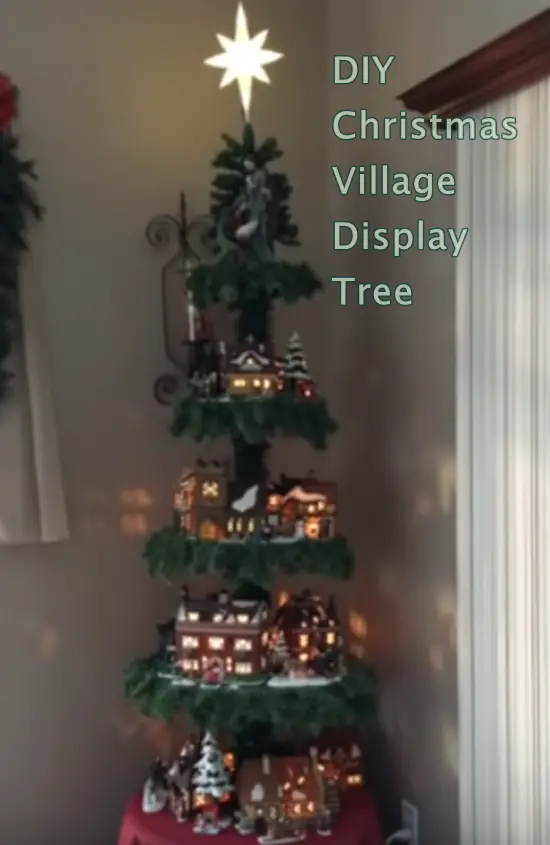
The holidays are a time for tradition, warmth, and creating cherished memories. And what better way to encapsulate that festive spirit than with a captivating Christmas village display? This year, ditch the traditional tabletop village and elevate your holiday decor with a stunning, DIY Christmas village display tree. This comprehensive guide will walk you through creating a unique and enchanting centerpiece for your 2024 Christmas celebrations, offering various styles and techniques to suit your creativity and skill level.
I. Choosing Your Tree Base:
The foundation of your village display tree is crucial. The size and shape of your tree will dictate the scale of your village and the overall aesthetic. Consider these options:
-
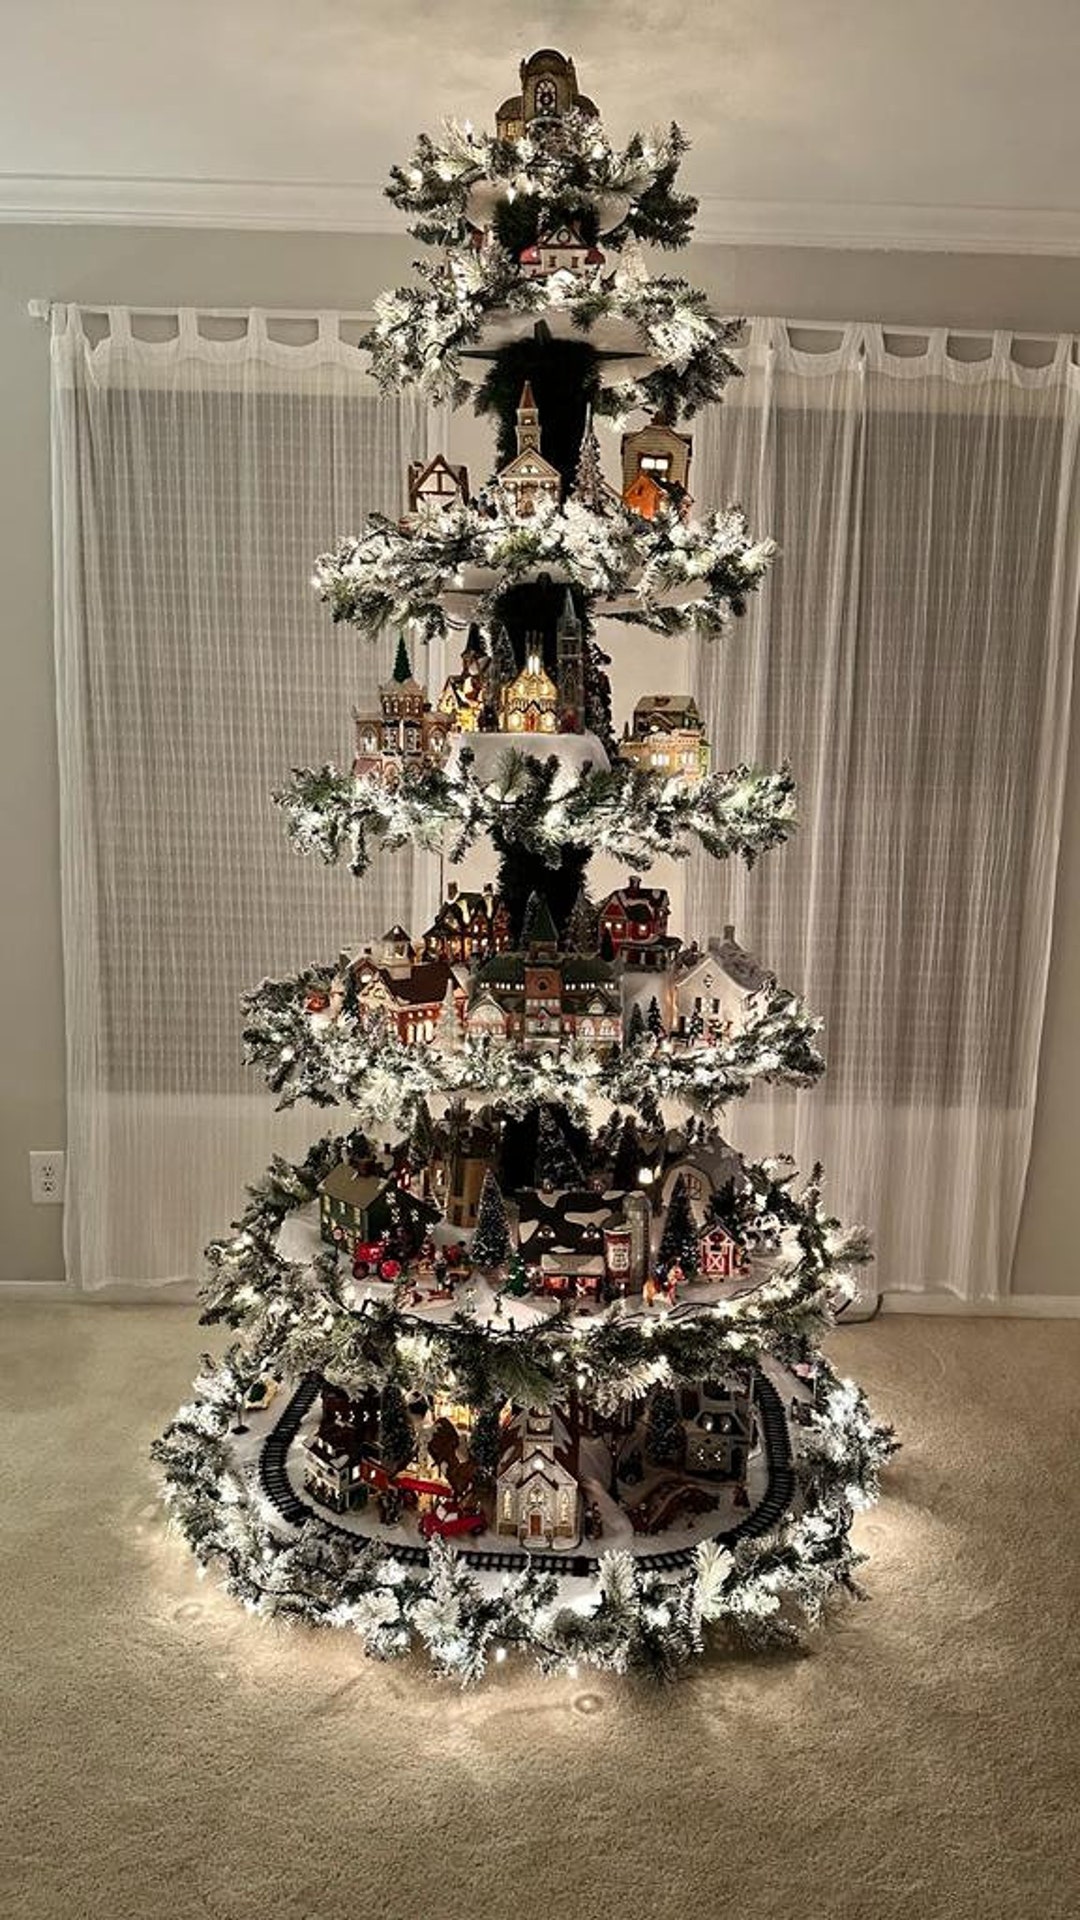
Artificial Christmas Tree: This is the most convenient option, offering a pre-shaped structure and a variety of sizes and styles to choose from. Opt for a slim profile tree, or one with a wider base for a more substantial village. Consider a flocked tree for a snowy village effect or a traditional green tree for a classic feel. Remove any pre-attached ornaments before beginning your village construction.
-
Upcycled Tree: Get creative and repurpose an existing item. A small, dried twig tree, a carefully shaped branch from your garden, or even a sturdy, upside-down cone made from cardboard or foam can serve as a unique and eco-friendly base. Ensure your chosen base is stable and strong enough to support the weight of your village elements.
-
DIY Tree from Scratch: For the ambitious crafter, building your tree from scratch offers complete control over its shape and size. You can create a tree from craft foam, wire mesh, or even carefully glued together twigs and branches. This option requires more time and skill but allows for a truly personalized creation.
II. Gathering Your Village Elements:
The heart of your Christmas village display tree lies in its miniature buildings and figures. Here are some sources and ideas:
-
Miniature Village Sets: Numerous retailers offer pre-made miniature village sets, ranging from quaint cottages to elaborate castles. These provide a convenient starting point, allowing you to focus on the arrangement and customization.
-
Individual Miniature Houses: For more control over your village’s composition, purchase individual houses and buildings. This allows for a more personalized and eclectic village, reflecting your own style and preferences. Look for houses with varying heights and architectural styles for visual interest.
-
DIY Miniature Houses: For the truly dedicated crafter, building your miniature houses from scratch offers unparalleled customization. Use craft materials like cardboard, wood, polymer clay, or even matchboxes to create unique structures. Online tutorials abound, offering guidance on various techniques and materials.
-
Figurines and Accessories: Don’t forget the details! Add miniature figurines of people, animals, and vehicles to bring your village to life. Include trees, streetlights, fences, and other accessories to enhance the realism and ambiance. Consider using LED lights to illuminate your village for a magical nighttime effect.
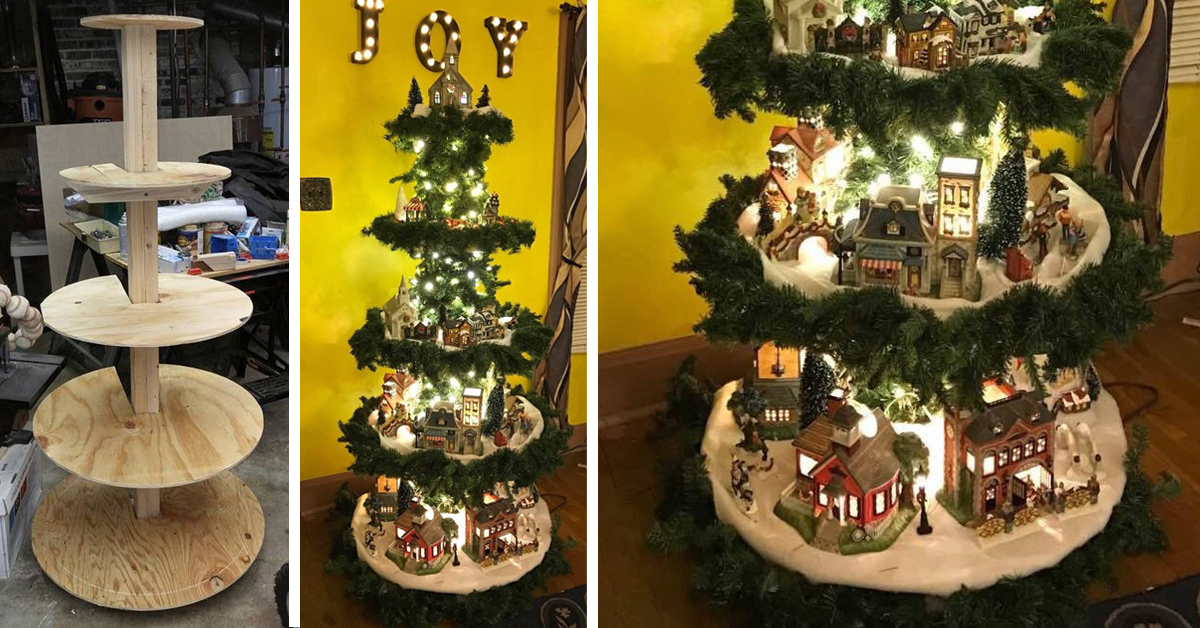
III. Constructing Your Village Display Tree:
Once you have your tree base and village elements, it’s time to assemble your masterpiece. Here’s a step-by-step guide:
-
Prepare the Tree: If using an artificial tree, ensure it’s securely positioned and stable. For DIY trees, reinforce the structure as needed.
-
Plan Your Layout: Before attaching anything, visualize the placement of your houses and other elements. Consider the size and shape of each building, ensuring a balanced and visually appealing arrangement. Sketch a rough plan if it helps.
-
Secure the Buildings: Use hot glue, strong adhesive, or small wires to attach your buildings to the tree branches. Ensure a secure bond to prevent accidents. Vary the heights and positions of your buildings to create depth and visual interest.
-
Add Figurines and Accessories: Once the buildings are in place, add your figurines and accessories. Arrange them strategically to create a sense of movement and activity within your village.
-
Incorporate Lighting: If using LED lights, carefully weave them through the branches and around the buildings, creating a warm and inviting glow. Battery-operated lights are ideal for safety and convenience.
-
Add Finishing Touches: Consider adding flocking to the tree branches for a snowy effect. You can also add glitter, faux snow, or other decorative elements to enhance the festive ambiance.
IV. Style and Theme Ideas:
The beauty of a DIY Christmas village display tree is its versatility. Here are some thematic ideas to inspire your creation:
-
Classic Christmas Village: Embrace traditional elements with quaint cottages, church steeples, and snowy landscapes.
-
Winter Wonderland: Create a magical winter scene with frosted trees, glittering snow, and ice sculptures.
-
North Pole Village: Bring Santa’s workshop to life with miniature elves, reindeer, and toy factories.
-
Victorian Christmas: Embrace elegance and sophistication with ornate buildings, gas lamps, and period-appropriate figurines.
-
Modern Minimalist Village: Create a sleek and contemporary village with clean lines, simple shapes, and a muted color palette.
-
Fairytale Village: Embrace fantasy with whimsical castles, enchanted forests, and magical creatures.
V. Troubleshooting and Tips:
-
Weight Distribution: Ensure the weight of your village elements is evenly distributed to prevent the tree from tipping over.
-
Adhesive Choice: Use a strong adhesive suitable for your chosen materials. Hot glue is versatile but requires caution.
-
Scale Consistency: Maintain a consistent scale for your village elements to avoid a disjointed look.
-
Creativity is Key: Don’t be afraid to experiment and personalize your village display tree. Let your imagination run wild!
-
Safety First: Use caution when working with hot glue and other potentially hazardous materials. Keep children and pets away from the project area.
VI. Beyond the Basics: Advanced Techniques
For the truly ambitious, consider these advanced techniques to elevate your Christmas village display tree:
-
Creating custom buildings from scratch: Master techniques like paper crafting, wood carving, or polymer clay sculpting to build unique and personalized structures.
-
Adding realistic lighting effects: Experiment with different types of LEDs, fiber optics, or even miniature spotlights to create dynamic and immersive lighting.
-
Incorporating sound effects: Add a subtle soundscape of Christmas carols or crackling fireplace sounds to enhance the ambiance.
-
Creating a diorama base: Instead of simply placing buildings on the tree, build a miniature landscape at the base to create a fully immersive scene.
-
Using different materials for texture and realism: Experiment with moss, lichen, miniature rocks, and other natural materials to add texture and authenticity to your village.
Creating a DIY Christmas village display tree is a rewarding and enjoyable project that will bring joy to your home for years to come. By following this guide and unleashing your creativity, you can craft a truly unique and enchanting centerpiece that will be the highlight of your 2024 Christmas celebrations. Remember, the most important ingredient is your passion and the joy of creating something special with your own hands. Happy crafting!


Closure
Thus, we hope this article has provided valuable insights into Crafting a Whimsical Christmas Village Display Tree: A DIY Guide for 2024. We appreciate your attention to our article. See you in our next article!