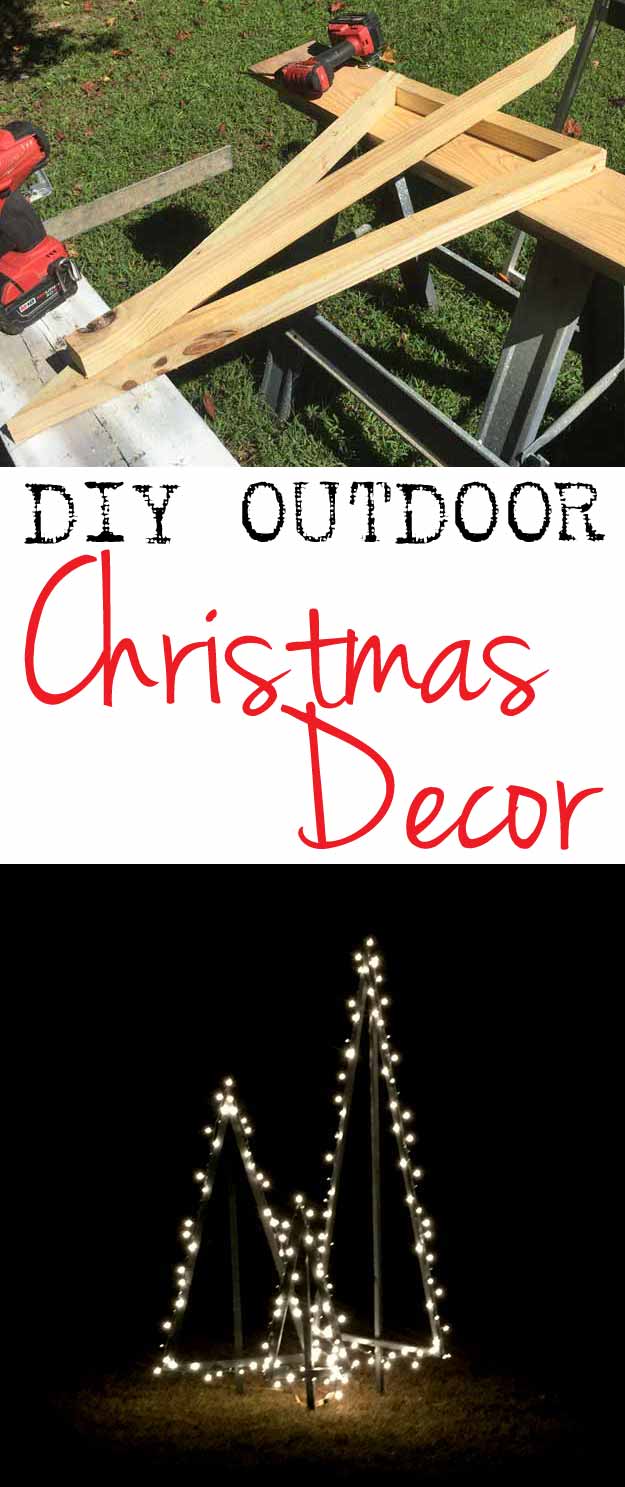
Illuminate Your Holidays: Crafting A DIY Outdoor Christmas Tree Of Lights For 2024
Illuminate Your Holidays: Crafting a DIY Outdoor Christmas Tree of Lights for 2024
Illuminate Your Holidays: Crafting a DIY Outdoor Christmas Tree of Lights for 2024
Introduction
With great pleasure, we will explore the intriguing topic related to Illuminate Your Holidays: Crafting a DIY Outdoor Christmas Tree of Lights for 2024. Let’s weave interesting information and offer fresh perspectives to the readers.
Table of Content

Illuminate Your Holidays: Crafting a DIY Outdoor Christmas Tree of Lights for 2024
Christmas is a time for twinkling lights, festive cheer, and unique displays of holiday spirit. While a traditional Christmas tree holds a special place in many hearts, the limitations of space, budget, or even the desire for something truly unconventional often lead us to explore alternative options. This year, consider ditching the traditional fir and embracing the brilliance of a DIY outdoor Christmas tree made entirely of lights! This innovative approach offers a modern, customizable, and surprisingly easy way to illuminate your holiday season in 2024.
This comprehensive guide will take you through the entire process, from planning and design to construction and maintenance, ensuring your light tree becomes a dazzling centerpiece for years to come.
Part 1: Planning and Design – Your Vision Takes Shape
Before you dive into the dazzling world of lights, meticulous planning is crucial. This stage sets the foundation for a successful and stunning light tree.
1. Location, Location, Location: The placement of your light tree significantly impacts its overall effect. Consider:
- Visibility: Choose a location where your tree will be easily visible from your home and street. Avoid areas obstructed by trees, buildings, or dense shrubbery.
- Power Source: Ensure a readily accessible power source nearby. Extension cords should be carefully concealed and safely managed to prevent tripping hazards.
- Ground Conditions: Assess the ground for stability. If you’re using a freestanding structure, ensure it’s level and won’t sink into soft soil.
- Local Ordinances: Check with your local municipality regarding any regulations on outdoor lighting displays, particularly regarding height and safety.
2. Size and Shape: Your tree’s dimensions depend entirely on your preferences and available space. Consider:
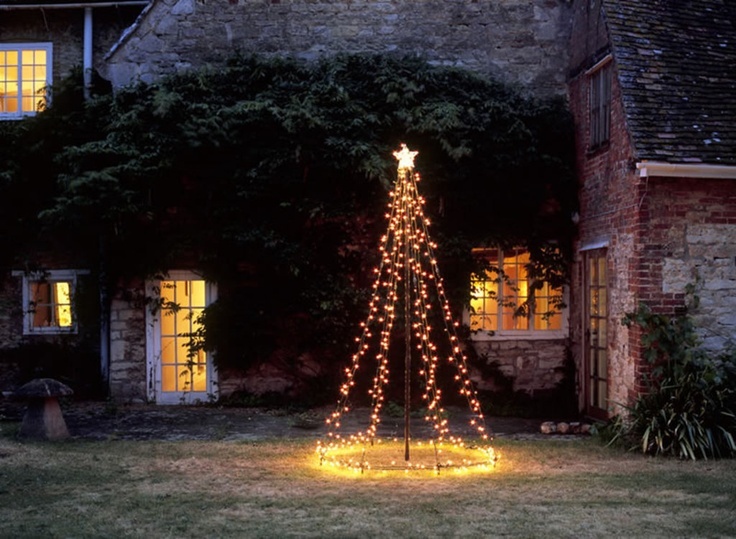
- Height: A taller tree creates a more dramatic impact, but requires more lights and potentially a more robust structure.
- Width: A wider tree fills a larger space, but might require more careful planning to maintain a balanced, aesthetically pleasing shape.
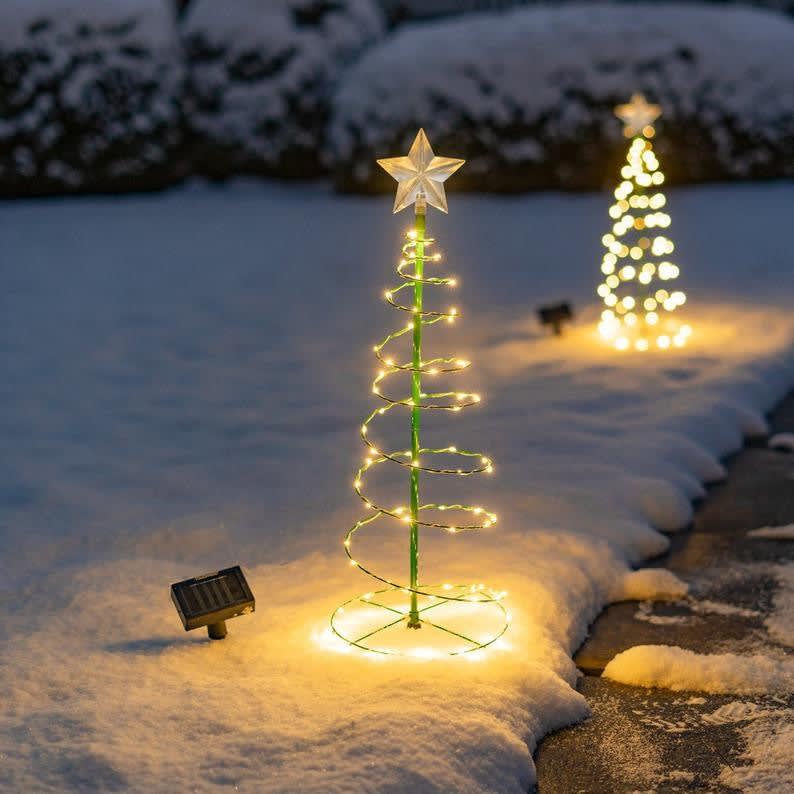
- Shape: While a traditional conical shape is popular, you can explore alternative shapes like spirals, arches, or even abstract forms. Let your creativity flow!
3. Light Selection: The heart of your project lies in the lights. Consider these factors:
- Type of Lights: LED lights are the most energy-efficient and long-lasting option. Choose from warm white for a classic feel, cool white for a modern look, or multi-colored for a vibrant display. Consider C7 or C9 bulbs for a bolder statement.
- Number of Lights: The number of lights directly correlates with the brightness and size of your tree. Calculate the required number based on your desired size and density. It’s better to have too many than too few.
- Light String Lengths: Purchase light strings of varying lengths to accommodate the different tiers of your tree.
- Connectors: Ensure you have enough connectors to link multiple light strings together seamlessly.
4. Structure (Optional): Depending on the size and complexity of your design, a supporting structure might be necessary. Consider these options:
- Metal Frame: A pre-fabricated metal frame provides a sturdy base, particularly for larger trees.
- PVC Pipes: PVC pipes can be easily connected to create a customizable framework.
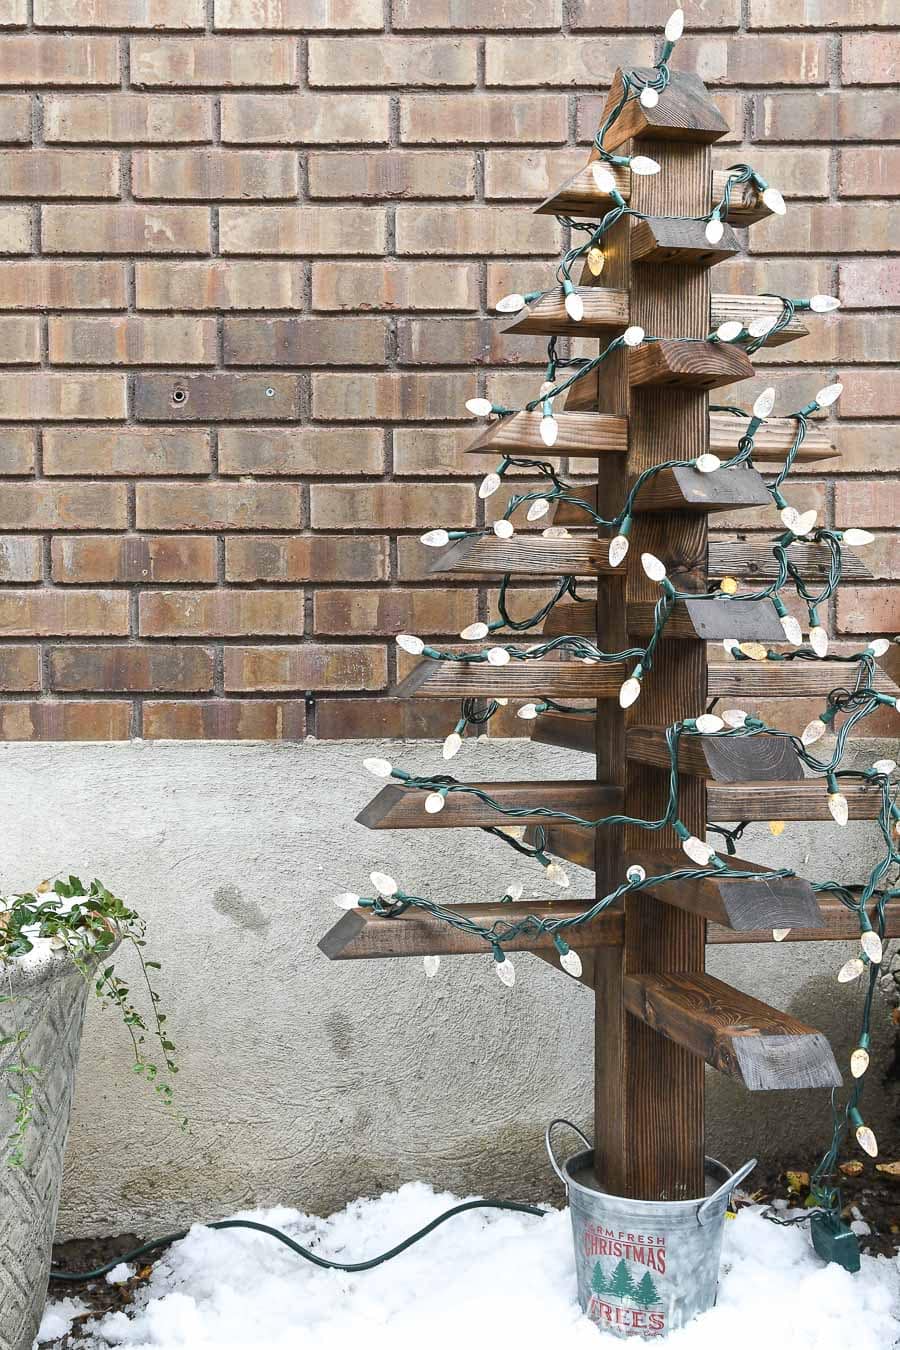
- Wooden Frame: A wooden frame offers a rustic charm, but requires more construction expertise.
- Freestanding Design: For smaller trees, you might forgo a frame altogether, relying solely on the lights to create the shape.
Part 2: Construction – Bringing Your Vision to Life
With your planning complete, it’s time to bring your light tree to life. The construction process varies depending on your chosen design and structure.
1. Assembling the Frame (If Applicable): If you’re using a frame, follow the manufacturer’s instructions carefully. Ensure the frame is stable and level before proceeding.
2. Attaching the Lights: This is where the magic happens. Begin by attaching the lights to the base of your structure or ground. Work your way upwards, creating layers or tiers to mimic the shape of a traditional tree. Consider these tips:
- Even Spacing: Maintain even spacing between light strings to ensure uniform brightness and visual appeal.
- Overlapping Lights: Slightly overlap light strings to minimize gaps and create a fuller, more vibrant effect.
- Securing Lights: Use zip ties, clips, or other fastening methods to secure the lights to the frame or ground.
- Testing as You Go: Regularly test the lights to ensure they’re functioning correctly.
3. Creating the Tree Shape: Carefully arrange the light strings to create the desired shape of your tree. Experiment with different arrangements to achieve the perfect look. For freestanding designs, carefully stake lights into the ground or use landscape pins to hold them in place.
4. Concealing Wires and Connectors: Neatly manage the wires and connectors to avoid a cluttered appearance. Use zip ties, cable clips, or even camouflage tape to hide them discreetly.
5. Power Connection: Connect the lights to a power source using a heavy-duty extension cord. Ensure the cord is properly grounded and protected from the elements. Consider using a GFCI-protected outlet for added safety.
Part 3: Enhancing Your Light Tree – Adding Personal Touches
Once the basic structure is complete, you can enhance your light tree with various decorative elements.
1. Adding Ornaments: While a light tree is stunning on its own, you can add subtle ornaments to enhance its festive appeal. Consider:
- Small, lightweight ornaments: Avoid heavy ornaments that could damage the light strings or the structure.
- Weatherproof ornaments: Choose ornaments designed for outdoor use to protect them from the elements.
- Themed ornaments: Incorporate ornaments that reflect your personal style or the overall theme of your holiday display.
2. Incorporating Other Lighting Elements: Combine your light tree with other lighting elements to create a more cohesive and spectacular display. Consider:
- Spotlights: Use spotlights to highlight the tree and create dramatic shadows.
- String Lights: Add additional string lights around the base of the tree or along pathways leading to it.
- Projected Images: Project festive images or patterns onto the tree for an extra touch of magic.
3. Ground Cover: Enhance the base of your tree with ground cover to complement its design. Consider:
- Pine boughs: Create a natural, rustic base.
- Mulch or gravel: Provides a clean and modern look.
- Holiday-themed decorations: Scatter small decorative items around the base to add a festive touch.
Part 4: Maintenance and Safety – Ensuring Longevity and Security
To ensure your light tree shines brightly for years to come, proper maintenance and safety precautions are essential.
1. Regular Inspection: Regularly inspect the lights and structure for any damage or loose connections. Replace any faulty bulbs or damaged components promptly.
2. Weather Protection: Protect your light tree from harsh weather conditions. Consider covering it during storms or periods of heavy snowfall.
3. Energy Efficiency: Use energy-efficient LED lights to minimize energy consumption and reduce your environmental impact. Remember to turn off the lights when not in use.
4. Safety Precautions: Always prioritize safety. Ensure the power cord is properly grounded and protected from moisture. Avoid overloading circuits, and never leave the lights unattended while plugged in.
Conclusion:
Creating a DIY outdoor Christmas tree of lights is a rewarding project that allows you to unleash your creativity and personalize your holiday display. By following this comprehensive guide, you can transform your outdoor space into a dazzling winter wonderland, creating a memorable and unique Christmas experience for yourself and your loved ones in 2024 and beyond. Remember to adapt these suggestions to your own space, budget, and aesthetic preferences, making your light tree a truly personal and magical expression of the holiday spirit. Happy crafting!


Closure
Thus, we hope this article has provided valuable insights into Illuminate Your Holidays: Crafting a DIY Outdoor Christmas Tree of Lights for 2024. We thank you for taking the time to read this article. See you in our next article!